
Web App beta
Link: http://pipeline.loni.usc.edu/webapp/

With the release of the LONI Pipeline Web App beta, users will notice that although most of the interface and functionality is the same as the desktop client, there are some differences and new features. This document will outline the various various web app in detail and serve as an informational tool for new users and old. Please keep in mind that this is a beta release and thus not all features will work as intended. For information on reporting bugs and getting support, please refer to the last section of this document.
1. Pipeline Account
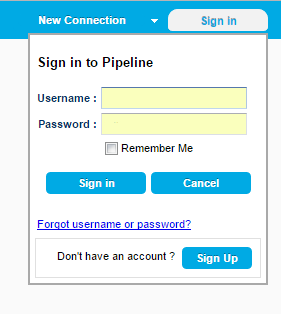 The connections bar is located at the top of the interface and there is a new button, “Sign in”. This is a feature where users will create a single Pipeline account and have access to all their saved information, such as configured connections and saved workflows, from any device.
Sign up for an account and then set up connections and begin saving workflows to your personal cloud library.
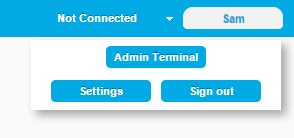
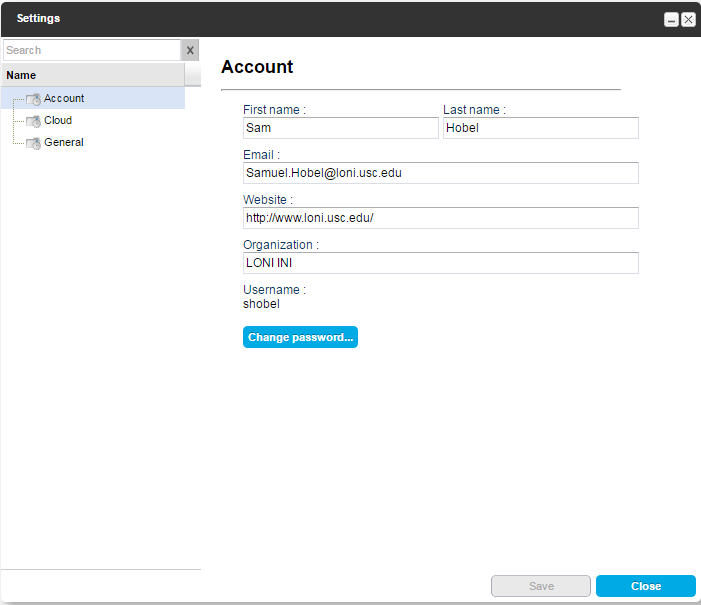
Clicking on the Sign In button after you are already logged in brings up a new menu. If you are an admin you will have access to the Server Terminal from this window. Otherwise you will just be able to edit your account Settings or Sign Out.
2. Pipeline Cloud & Auto Saving
 The web app’s version of a personal library for saving workflows is called the “Pipeline Cloud”. Each user is given space on the LONI server for saving workflows, which gets tied to your Pipeline account so that you can access your files from any device by logging in.
Auto saving is another feature new to the web app. Every few minutes, Pipeline will check for unsaved changes to your workflows and auto-save them to the cloud.
Your saved and auto-saved workflows in the pipeline cloud are available without needing to connect to a server.
3. Control Bar

Clicking on the New Workflow button at the home page will bring up the canvas and a new control bar that gives users fast and convenient access to workflow building tools.
On the left side is the execution menu which now contains a button for validating a workflow. Next to that are buttons for creating the various of module types, text boxes, images, and a button for grouping modules together if you have more than 1 selected. Other miscellaneous editing functions that are spread out amongst different menus in the desktop client are also provided here in the toolbar.
There is a new button in the miscellaneous section called “Data View” which becomes available when a workflow is in execution mode. More details about this feature will be discussed in a subsequent section.
Clicking on the down arrow below the data source and data sink control bar icons will show a dropdown menu with the different types of data sources that can be created. You can choose a source that will hold local files, files on a remote server, in a cloud service, or in a database. We currently support 5 cloud services (Amazon S3, Box, Dropbox, Google Drive, Microsoft OneDrive) and 4 databases (LONI IDA, XNAT, NDAR, Transmart).

4. Creating/Editing Modules
All of the module editing windows have been changed and improved in a variety of ways. They have a stacked panel layout and the data type and acceptable file types fields are now at the top of the window in a space efficient manner.
In the edit modules window, the location of the program is now the first field in the window and stays fixed at the top so that it is always visible.
In the data source/sink window, clicking on the browse button lets you specify files from any supported location, meaning you do not have create a different type of data source depending on where your files are. In addition, adding metadata has become more intuitive, being its own tab in the stacked layout. The metadata specific options, such as grouping, become available in the new tab.
Currently, being connected to a server and specifying that server in the Server Address window is required for both Local and Server files. Local execution has not been implemented yet and thus local files need to be uploaded to the remote server before processing the same way the desktop client stages local files before remote execution.
 |
|
The normal File menu options such as new, open, and save are located at the top left of the browser window, as shown below.
![]()
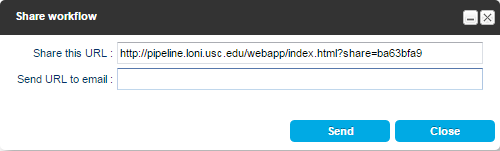
There is a new “share” button that provides a url which any user can use to open the current workflow in a browser from any device.
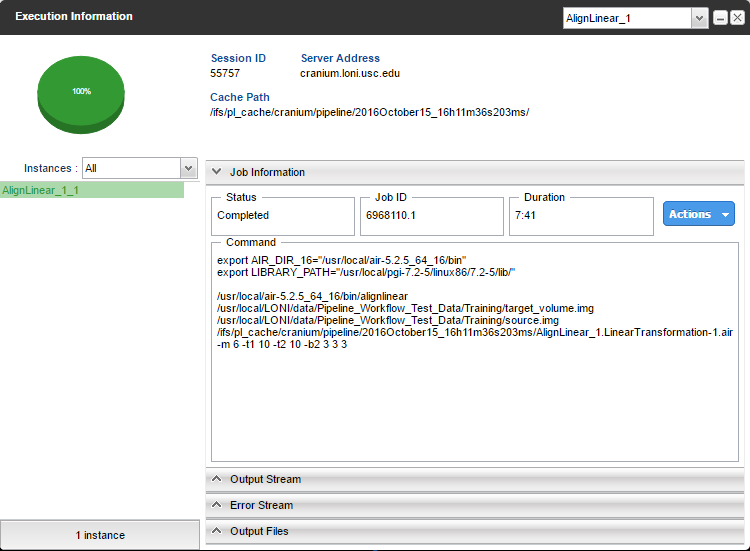
5. Execution

The execution process has remained relatively unchanged aside from the fact that local execution is not currently available, however there are some interface differences. A new section, “Execution info”, appears in the top control bar when a workflow is executing. Modules will create colored semi-circles around themselves representing both their status and percentage completed, and the Execution Information window has a pie chart to display this information as well.
 |
 |
6. Data View
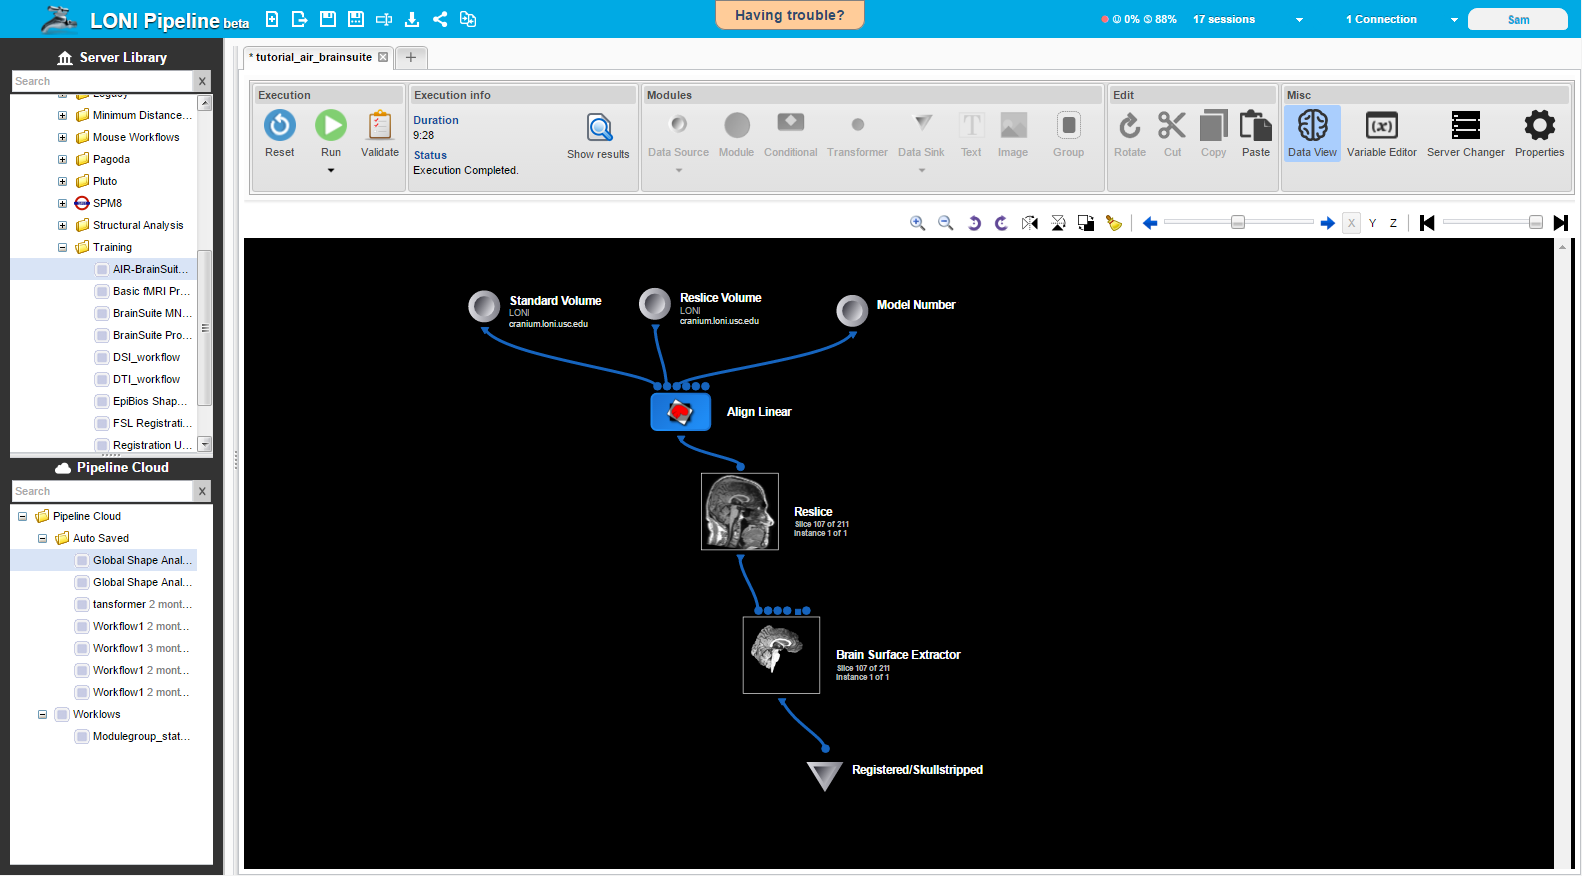 A major new feature is the Data View toggle button, which becomes available when a workflow is executing and has some viewable output files. When this button is toggled on, the icon representing modules that have outputs in a format displayable by the built-in image reader (analyze, nifti, etc) will be replaced with a small image of the module’s output file. If the module contains several jobs, and/or each job creates an output with multiple slices, as is typical with many neuroimaging outputs, a single slice from one of the outputs will be shown. A toolbar is provided below the main control bar discussed earlier that allows users to flip through slices of an output image or change between the different job outputs.
![]()
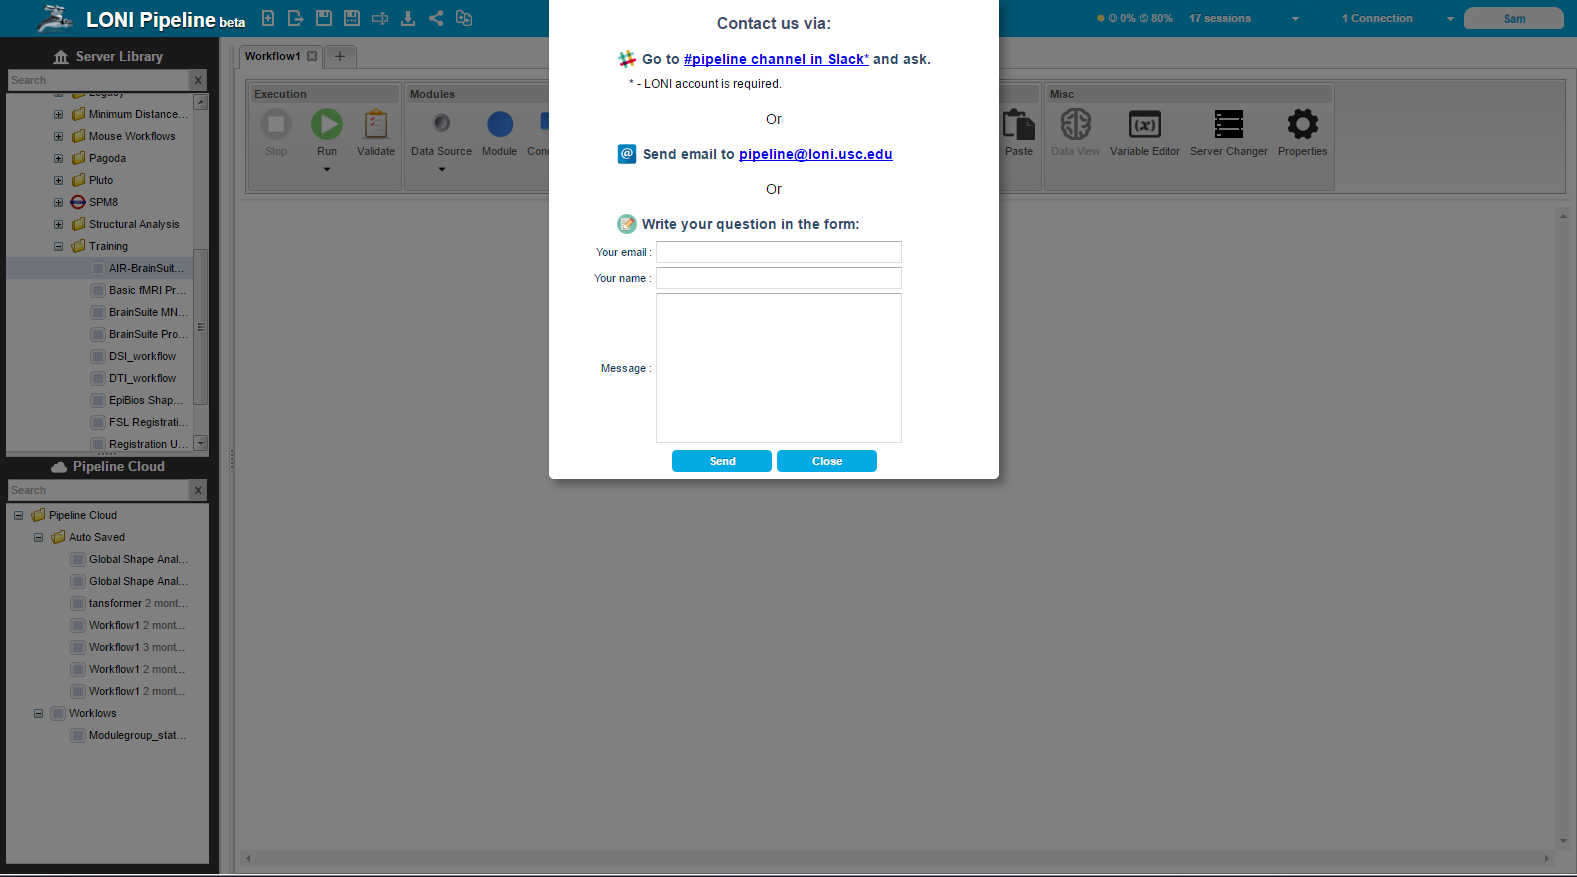
7. Support
As previously noted, this is a beta release and therefore issues with certain features are expected. For this reason, there is a “Having Trouble?” button at the top center of the pipeline browser that opens a dialog presenting different options for receiving support or reporting an issues/bugs. We encourage users to ask for support and report problems as much as needed because we are not always aware of all the issues and this will help the Pipeline web app become a better product.
For more information on features not discussed in this document, please see the online Pipeline documentation and tutorials at http://pipeline.loni.usc.edu/learn/.