- Server library
- Personal library
- Workflow area
- Connection manager
- Provenance editor
- Preferences
- Search feature
- Checking for latest updates
- Starting GUI from command line
- Running from the command line
3.1 Server library
When you launch the Pipeline you’ll notice the area to the left is empty. This is the server library where you can see a list of all the modules available to you when you connect to different servers. Since this is your first time launching the program, you have nothing listed there, but we’ll connect to a server soon to get access to some tools.
If you want to gain access to the tools LONI has made available through its Pipeline server apply for an account and after connecting to the server (cranium.loni.usc.edu) you will see the library populated with all the tools available on the server.
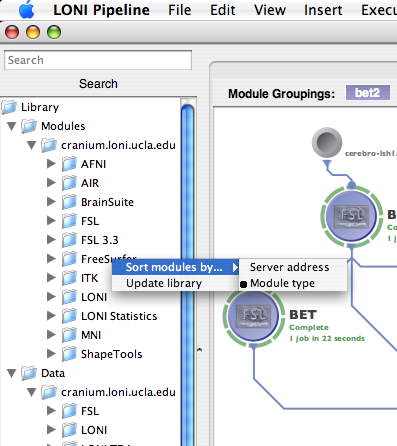
Server library supports workflows from multiple servers. Now you can easily sort library items “by Module Type” or “by Server address”. Also you can manually right click and call Update library function which will automatically connect to servers included in your current server library and update the Server Library Content on your local computer. If you remove your library content and run Update library command, Pipeline will check for your current connections and will update only from servers you are connected to.
Even after you disconnect from a Pipeline server, the list of tools on that server will still remain cached on your computer so you can construct workflows while you are offline.
You can search the server library by keyword, and it will return matched result ranked by popularity.
3.2 Personal library
The Personal library can be accessed by going to ‘Window->Personal Library.’ This is where your library of workflows and personally created modules are stored. Simply select a directory (or use the default one specified in the preferences) and save all your personal modules and workflows in there. Then when you open up your personal library, you’ll see all the modules in there, and you can drag them in or open up copies of them quickly and easily.
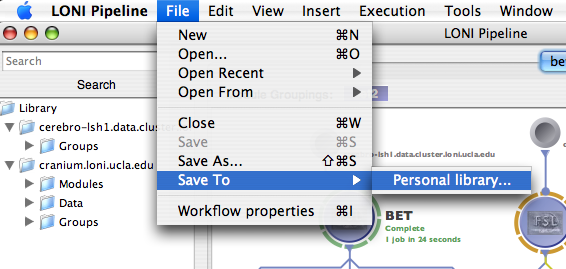
Pipeline allows you to save and open workflows directly to/from Personal library. Click File -> Save To -> Personal library… to save to personal library and File -> Open From -> Personal library… to open from personal library.
The main feature of the personal library is that it can be used in just the same way as the server library to construct workflows. If you have defined lots of modules that describe executables on your local computer or even module groups, you can drag in copies of them to create even more sophisticated workflows.
3.3 Workflow area
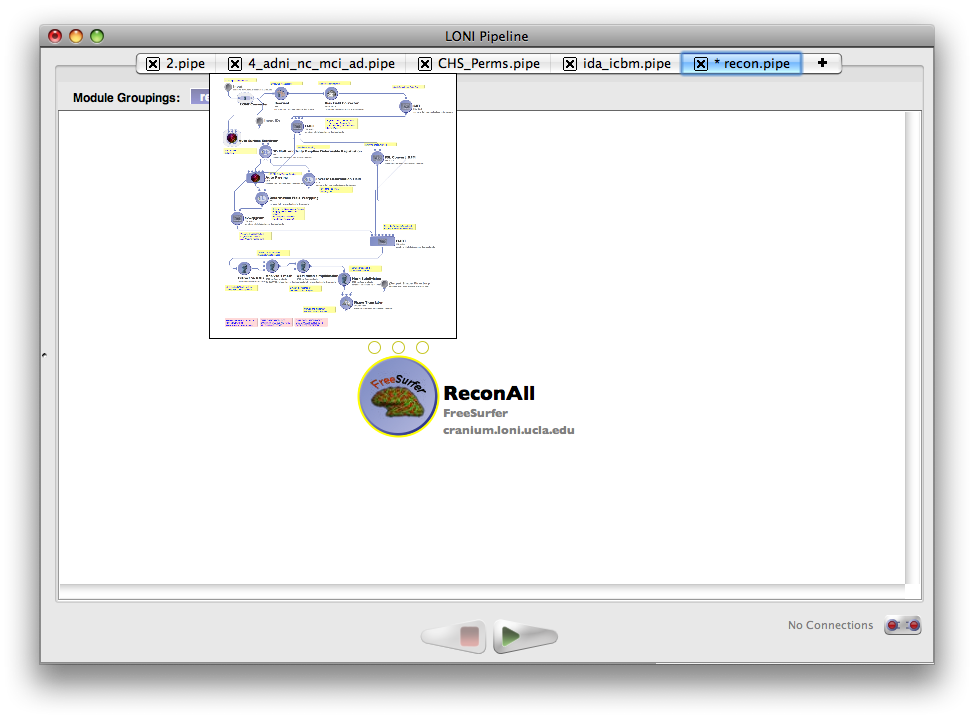
The large area with a faucet logo on it is the workflow area. You can open a workflow or start a new workflow from here by clicking on one of the buttons at the center of the area. You can also see a list of recently accessed workflows if there is any.
You can open multiple workflows at the same time, using tabs or windows (just like a web browser). You can arrange tabs, drag and drop tab to have a new window, close any tabs by clicking the cross icon for the tab, and so on. You can also move over the tab that is not in current view, it will show you a small overview of the workflow.
3.4 Connection manager
Oftentimes you want to connect to different Pipeline servers to get access to their tools and build workflows out of them. To bring up your list of connections, go to the ‘Window’ menu and click on ‘Connections…’. Alternatively, you can click on the disconnected circles at the bottom right of the window, and in the popup menu click on ‘Connections…’.
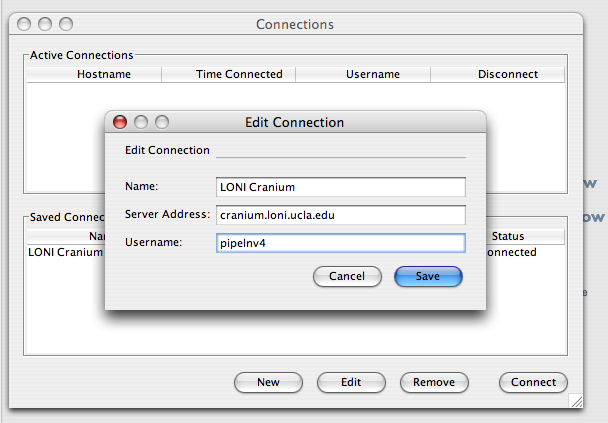
By default, Pipeline has LONI server (cranium.loni.usc.edu) as saved connections. You need to apply for an account to actually connect to it. You can click Edit and put your LONI username, and then click Save. Once you’ve entered the connection, go ahead and click ‘Connect’. After 30 seconds or so you’ll notice that your server library has been populated with tools from the server. By clicking New, you can add a connection to any Pipeline server that you want to access.
3.5 Provenance editor
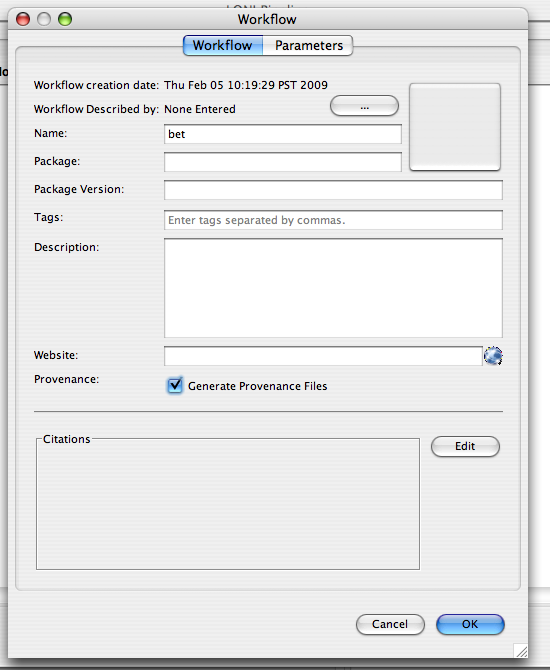
Provenance files can be generated along with your output files. By default, provenance generation not enabled. To enable this, make sure you have the latest version of Pipeline, open the workflow, select File -> Workflow properties, then check Generate provenance files.
The XSD document for Provenance files is available for download here.
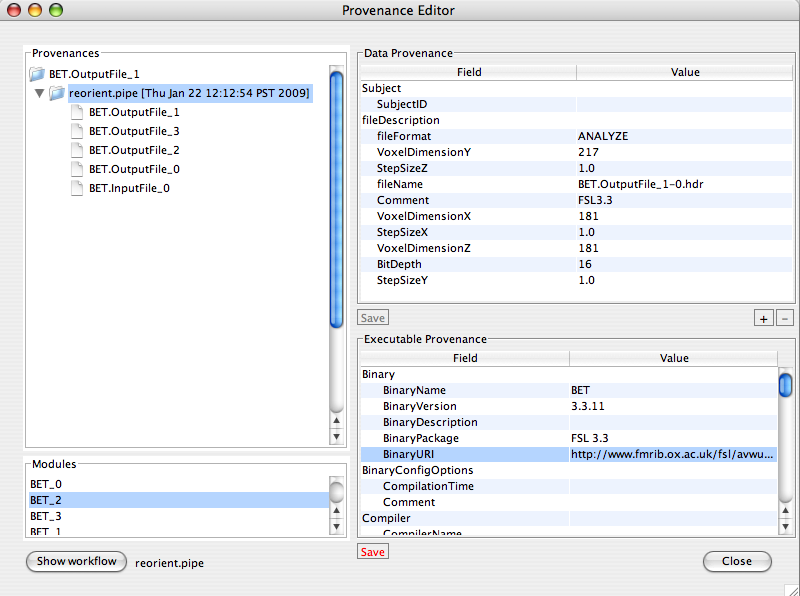
Pipeline includes a provenance manager, which enables tracking data, workflow and execution history of all processes. This functionality improves the communication, reproducibility and validation of newly proposed experimental designs, scientific analysis protocols and research findings. This includes the ability to record, track, extract, replicate and evaluate the data and analysis provenance to enable rigorous validation and comparison of classical and novel design paradigms. Provenance editor allows you to view and edit provenance. To open provenance editor, you can click Tools -> Provenance Editor, and open a provenance file (.prov). If provenance was enabled for the workflow, you can also open the provenance file using the provenance editor by right-click finished module -> Execution Logs -> Output Files tab -> select the file with .prov extension, and click Edit Provenance on lower right.
3.6 Preferences
Bring up the preferences dialog:
OS X: Go to the ‘LONI Pipeline’ menu and select ‘Preferences.’
Windows: Go to ‘Tools’->’Options’
Linux/Unix: Go to ‘Edit’->’Preferences’
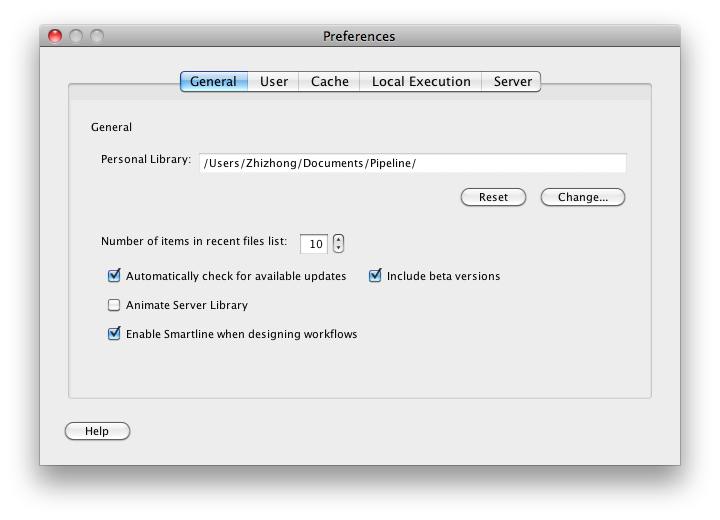
- Personal Library is where your library of workflows and personally created modules are stored.
- Automatically check for available updates: if checked, Pipeline will check for update every time it starts.
- Animate Server Library: if selected, server library will hide automatically when workflow is executing, and will show up automatically when workflow is stopped.
- Enable Smartline when designing workflows: If enabled, Pipeline will create translation module between image files automatically when making connections. You can always override this option by holding the Shift key while dragging connections.
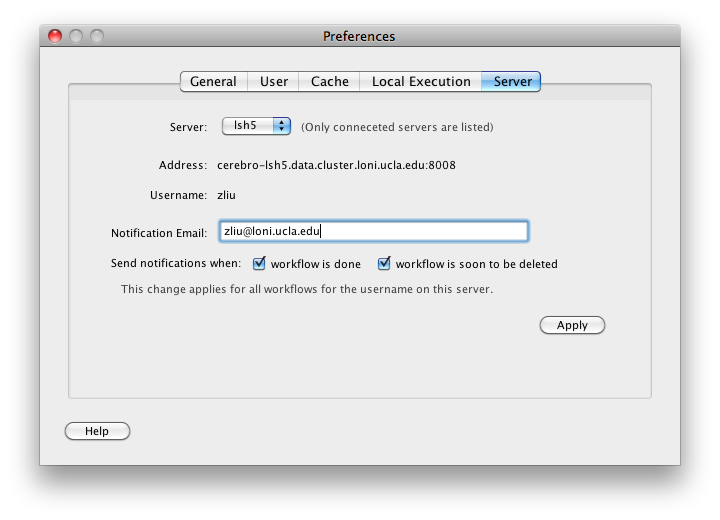
- Starting from version 5.1.4, email notification has been moved to Server tab.
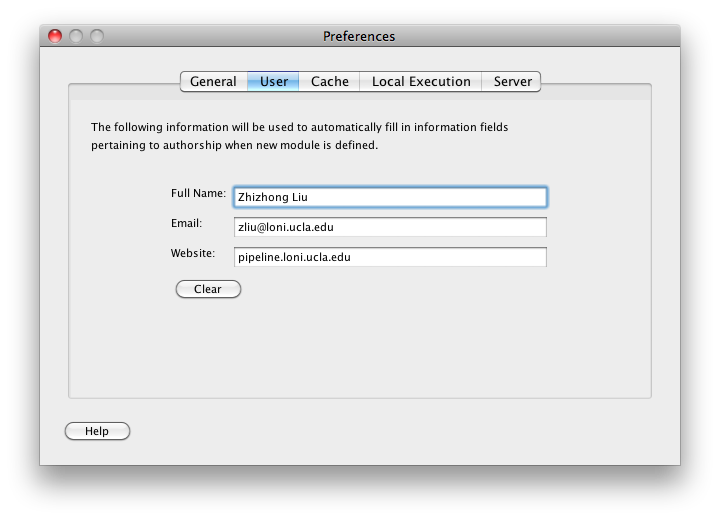
- This tab contains author information and it will automatically apply to the “Module Described by” field for the module you created.
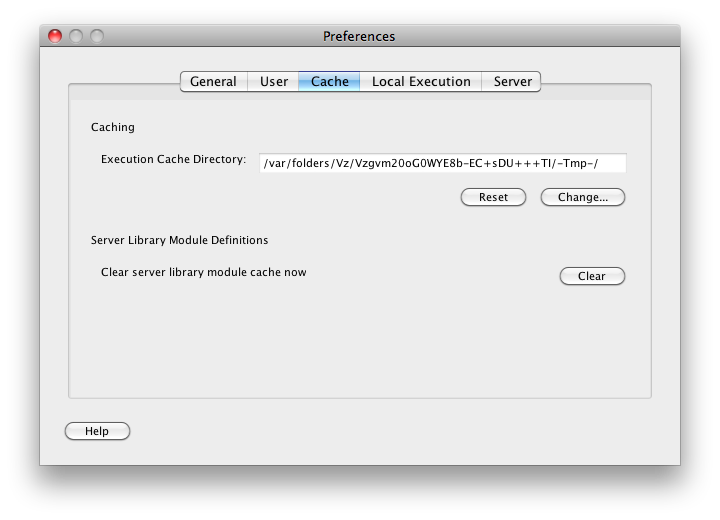
- The execution cache directory is where all intermediate data is written to while executing a workflow.
- The library module cache can be cleared here (similar to a web browser cache).
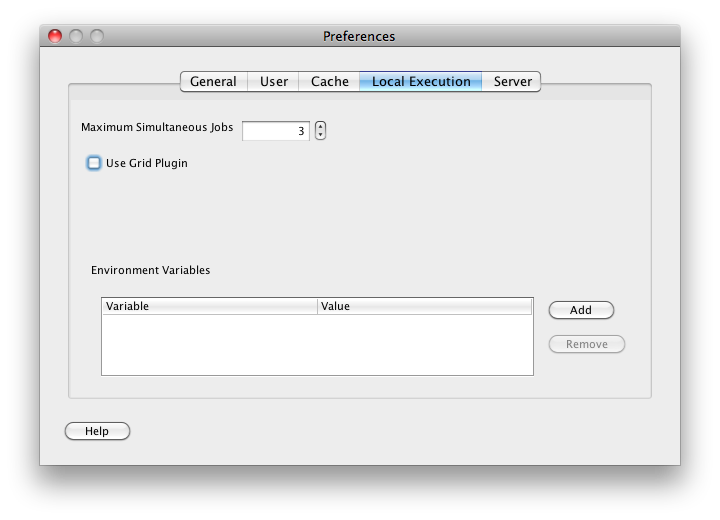
- Maximum simultaneous jobs is the number of jobs that will run in parallel when executing a workflow that has many jobs that are ready to submit at once. Once this limit is reached, the other jobs will be queued up until other ones complete.
- Use Grid Plugin, if you have a grid manager locally, checking this will enable your local workflows sent to the grid manager. You must specify your grid plugin jar file path and the class name. Please check Grid Plugin API Developers Guide and Server Guide for more information.
- Environment Variables for your local execution should be defined here.
- This tab lets you set up preferences specific to a Pipeline server. The Pipeline server can send email notifications when your workflow is done, and 1 day before your workflow being automatically removed. Since this setting is synchronized to the Pipeline server, you must connect to the server to be able to view and edit. Once you clicked Apply, the changes will take effect to all your workflows on that server.
3.7 Search feature
The Search feature in both the Library and Personal Library panels allow you to query for the modules that reside in the respective menu panes. The Search function will return results drawn from the module’s name, author list, citations, tags, description, and parameter fields.
3.8 Checking for latest updates
In the Help menu, you can check to see if you have the latest version of the Pipeline client by clicking on “Check for Updates…”. Pipeline will inform you if there is a newer version available, and you can download and install it by following the instructions.
3.9 Starting GUI from command line
You can start the LONI Pipeline client GUI under command line. Simply open up Terminal, go to the directory where Pipeline.jar is installed, and type:
java -cp Pipeline.jar ui.gui.Main
Optionally, you can give arguments, such as files to open or execute, username and password, so that the GUI will open with given workflows and runs them automatically. The usage is:
java -cp Pipeline.jar ui.gui.Main [OPTIONS] workflow1.pipe workflow2.pipe ... workflowN.pipe [paramID1=value1 ... paramIDN=valueN]

[{variableName1}=variableValue1 ... {variableNameN}=variableValueN]
-executevalidates then executes the specified workflow(s). if -execute is not given, workflows will opened only.-username=USERprovides username for execution.-password=PASSprovides password for execution.-urlworkflows are provided as URL. If -url is not given, workflows are provided as local files-replaceServer=my.new.serverreplaces all non-local servers in the workflows with the new server
[paramID1=value1 … paramIDN=valueN] lets you bind values to different parameters in the workflow. All bindings specified on the command line are in addition to any values already bound to them. Multiple bindings to the same parameter id will also be added onto the same parameter.
Some example bindings:
MyModule.OutputFile_0=pipeline://localhost//home/user/Desktop/myData.nii.gz
YourModule.InputImage_0=pipeline://localhost/C:\data\yourData.nii.gz
HerModule.InputAtlas_1=pipeline://cranium.loni.usc.edu//data/atlas1.img
[{variableName1}=variableValue1 … {variableNameN}=variableValueN] similar to the parameter binding, it lets you give values to different variables specified in the workflow. All values specified on the command line are in addition to any values already defined to them.
The GUI client will start up with command line arguments. You can also have your workflow submitted under command line without opening the GUI client. It is covered in the section: Running from the command line.
3.10 Running from the command line
Pipeline command line interface lets you validate and submit single or batch workflows, it also lets you manage your workflows. To launch the Pipeline’s command line interface, you need to go into the directory where your Pipeline.jar file is located:
- OS X Inside Applications directory,
LONI Pipeline.app/Contents/Resources/Java - Windows In your install location, which is usually
C:\Program Files\LONI\Pipeline\ - Linux In your installed location
Once inside that directory, you can simply launch it with the following two options: submit or manage workflows.
3.10.1 Submitting workflows from command line
Usage:
java -cp Pipeline.jar ui.cli.Main SUBMIT_OPERATION [SUBMIT_OPTIONS] TARGETFILE/TARGETDIR [paramID1=value1 paramID2=value2 ...] [{variableName1}=value1 {variableName2}=value2 ...]
Square brackets indicate optional arguments. Below is a detailed explanation for each argument:
SUBMIT_OPERATION indicates what do you want to do, you can have one of the following options:
-executevalidates then executes/submits the specified workflow(s).-validatejust validates the specified workflow(s) and exits.-displaydisplays all the required/enabled parameters in the workflow(s).
[SUBMIT_OPTIONS] lets you specify how you want Pipeline to run your workflow(s), these are the flags:
-syncprogram will not exit until workflow finishes executing. This flag is automatically enabled for a workflow that executes locally.-batchBatch processes TARGETFILE as either a list of .pipe files (text file), or a directory containing .pipe files. If it’s a list of .pipe files, it should contain one workflow path (and optionally parameter and variable assigments) per line.-parallel=NUMBERMaximum number of parallel workflows to be processed in the batch processing mode. Can only be used with-batchoption. Default value is 5. More memory is recommended with a large number of parallel workflows.-credentials=FILESpecify an XML file containing credentials to a Pipeline server that will be needed for execution or validation. If this is not provided, the program will prompt for username and password. Format is the following:
<?xml version="1.0" encoding="UTF-8"?>

<connections>

<conn address="cranium.loni.usc.edu" user="jane" password="secret" />

</connections>
TARGETFILE is the path of the single .pipe file you wanted to run, or if -batch option is enabled (see SUBMIT_OPTIONS), is a list of .pipe files (text file) containing one path per line, or a directory path containing .pipe files.
TARGETDIR is a directory containing .pipe files, can only be used with -batch option.
[paramID1=value1 paramID2=value2 …] lets you bind values to different parameters (identified by parameter ID) in the workflow. To find out parameter ID, open the workflow (.pipe file) with a text editor and look for “input id=” or “output id=”. To can also find by parameter name and/or description text. All bindings specified on the command line are in addition to any values already bound to them. Multiple bindings to the same parameter id will also be added onto the same parameter. If you have special characters (e.g. space, $, *) in the binding, you can use quotes (“) around the bindings.
Some example bindings:
ModuleName_0.OutputFile=pipeline://cranium.loni.usc.edu//data/atlas1.img
ModuleName_1.InputImage="pipeline://localhost/C:\my data\file.nii.gz"
ModuleName_2.InputAtlas=pipeline://localhost//home/user/Desktop/myData.nii.gz
[{variableName1}=value1 {variableName2}=value2 …] similar to the parameter binding, it lets you give values to different variables specified in the workflow. All values specified on the command line are in addition to any values already defined to them. If you have special characters (e.g. space, $, *) in the binding, you can use quotes (“) around the bindings.
3.10.2 Managing workflows from command line
Usage:
java -cp Pipeline.jar ui.cli.Main MANAGE_OPERATION -server=SERVER [MANAGE_OPTIONS]
Square brackets indicate optional arguments. Below is a detailed explanation for each argument:
MANAGE_OPERATION indicates what do you want to do, you can have one of the following options:
-status [SESSIONID]Shows the status of a given workflow session. If no SESSIONID is given, it lists all active sessions for the user.-stop SESSIONIDStops/resets a given workflow session. If session is running or backlogged, it will be stopped and removed. If session is complete, it will be removed.-pause SESSIONIDPauses a given running workflow session. If session is not running, it will have no effect.-resume SESSIONIDResumes a given paused workflow session. If session is not paused, it will have no effect.SESSIONIDis the ID of an active workflow seesion. Session ID is displayed when you execute a workflow, or you can use -status to find all your active sessions.
-server=SERVER Specifies the server address. e.g. -server=cranium.loni.usc.edu
[MANAGE_OPTIONS] available option:
-credentials=FILEPlease see above under SUBMIT_OPTIONS
Examples
java -cp Pipeline.jar ui.cli.Main -execute -sync -credentials=/path/login.xml /path/workflow.pipe
Submit the workflow and wait (not exit) until the workflow is completed successfully. Please note, terminating the process (ctrl+C or kill command) will not stop/remove the submitted workflow. To stop a submitted workflow, use the -stop option.
java -cp Pipeline.jar ui.cli.Main -execute -credentials=/path/login.xml /path/to/dir
Submit all the workflows in /path/to/dir. It will exit once all workflows are submitted to the server (won’t wait until they finish running)
java -cp Pipeline.jar ui.cli.Main -execute -credentials=/path/login.xml /path/workflow.pipe ModuleName_0.InputFile=pipeline://cranium.loni.usc.edu//data/atlas1.img ModuleName_0.InputFile=pipeline://cranium.loni.usc.edu//data/atlas2.img ModuleName_0.InputFile=pipeline://cranium.loni.usc.edu//data/atlas3.img
Submit workflow with 3 input values assigned to parameter InputFile of module ModuleName_0. If that parameter is empty, then it will have 3 inputs assigned. If that parameter already has some values, these 3 inputs will be added on the existing values giving in the workflow (/path/workflow.pipe in this example).
java -cp Pipeline.jar ui.cli.Main -status -credentials=/path/login.xml -server=cranium.loni.usc.edu
List all active workflows for the user on cranium server
java -cp Pipeline.jar ui.cli.Main -pause 12345 -credentials=/path/login.xml -server=cranium.loni.usc.edu
Pause workflow session ID 12345 on cranium server.
| Previous: 2. Installation | Table of Contents | Next: 4. Building a Workflow |


