- Syncing Execution Flow
- Exporting Pipeline Workflow to Script
- Remote GUI Invocation
- Workflow Diff Utility
7.1 Syncing Execution Flow
If your pipeline requires the sequential execution of modules, but the modules do not have any dependencies on each other to regulate the ordering of the execution, then there is a way you can construct your workflow to preserve the order of execution. Let us look at a concrete example.
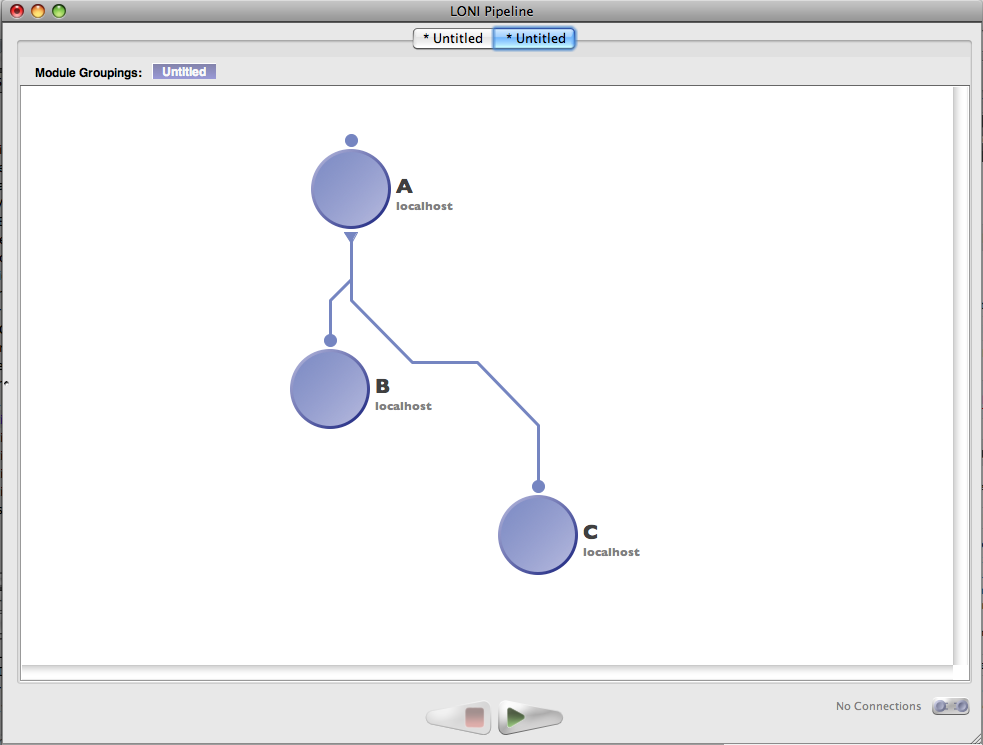 Module A generates an output file, which is used by both Module B and Module C. However, Module B and Module C has an “implicit dependency”, meaning that although there is no explicit input/output file passing between these two modules, Module C has to be executed after Module B is complete. This is illustrated on the left.
The workflow above will not guarantee Module C executed after Module B is done. As soon as Module A finishes, Module B and C will start. To solve this, there are two ways.
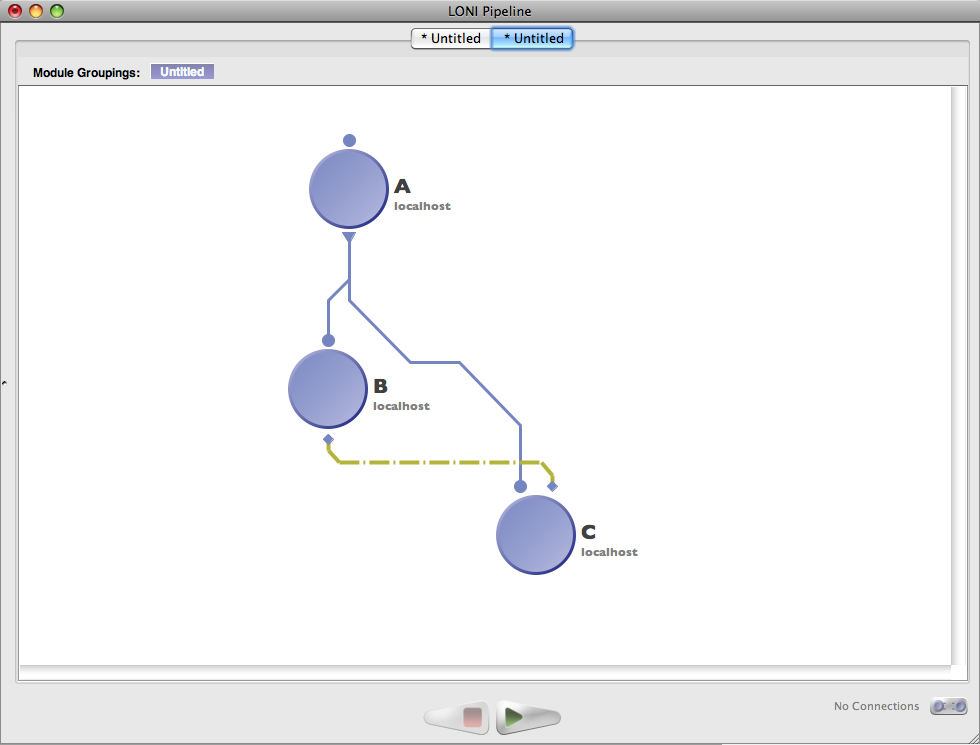
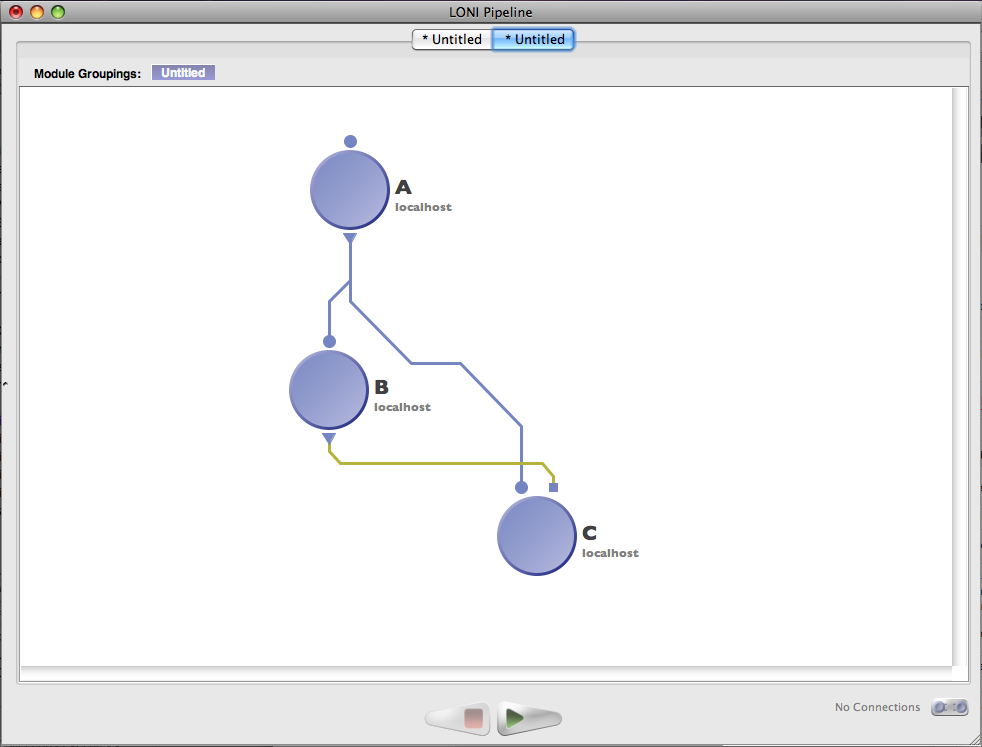 Make a flow control connection between Module B and C that will force Module C to wait until Module B completes. In order to configure the a flow control connection, add a new output parameter of Module B, specify it as type Flow Control. Next, add a new input parameter of Module C, specify it as type Flow Control too. Connect these two parameters and you are done. See the modified workflow 1st from the left (the flow control connection is highlighted).
Alternatively, you create a new output parameter of Module B of type File, with the number of arguments at 0. Next, create a new input parameter of Module C of type File, also with the number of arguments at 0. Connect these two parameters. See the modified workflow 2nd from the left (the connection is highlighted).
7.2 Exporting Pipeline Workflow to Script
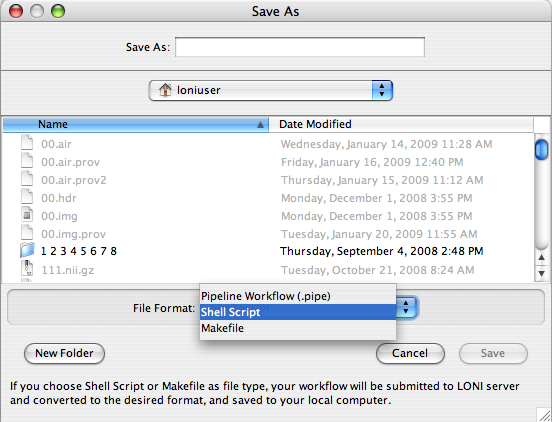
Pipeline workflows (.pipe files) may be exported as scripts. This enables trivial inclusion of pipeline protocols in external scripts and integration into other applications. Currently, the LONI Pipeline allows exporting of any workflow from XML (*.pipe) format to a makefile or a bash script for direct or queuing execution.
Simply open up any workflows, make changes if necessary, and choose File -> Save As… Choose a folder and specify file name and file format and Pipeline will export this wrokflow to your desired format.
7.3 Remote GUI Invocation
If you are running a remote executable that starts up a GUI, you need to follow these instructions to be able to visualize the user interface on your local machine. First of all, make sure that you are running an X server on your computer (X11 on Mac, XWin on Windows, or equivalent). Secondly, you need to wrap the tool that you intend to run into a script that sets the proper environment before execution. This entails the setting of the DISPLAY environmental variable. Now, instead of running the executable directly from a Pipeline module, you need to run the wrapper script. For instance, we can have a bash script ‘matlab.sh’ that has the following contents:
#!/bin/bash
# take ip address as an input parameter
ip_address=$1
# set environment
export DISPLAY=${ip_address}:0.0
# launch the matlab gui
/usr/local/bin/matlab
exit $?
Note that ${ip_address} is a variable that is extracted from a user-provided parameter and needs to correspond to the IP address of your local computer. Alternatively, if you want to avoid using the wrapper script, you can use the Package Mapping Utility.
Finally, in the module definition dialog, under the Execution tab, click ‘Show Advanced Options’ and check the ‘Requires external network access’ checkbox. This will make sure that the job is submitted to a compute node that has external network access and can communicate with your local X server.
7.4 Workflow Diff Utility
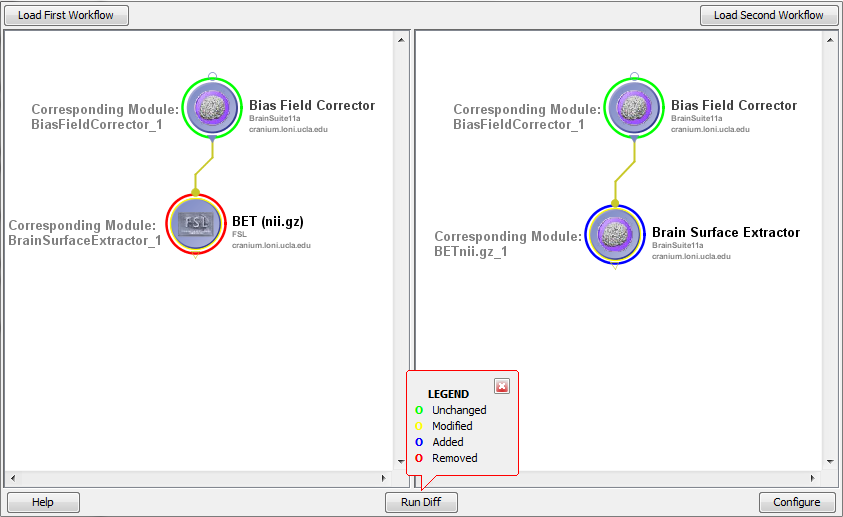
Users can now compare workflows within the Pipeline interface to determine the differences. In order to launch this component, look for the Diff Workflows item under the Tools menu. A dialog will appear, with two panels arranged side-by-side and four buttons. Use the Load First Workflow and Load Second Workflow buttons, arranged above the respective panels, to load the two workflows that are going to be compared. The Run Diff button at the bottom will run the comparison algorithm and produce visual results to the user.
There are four basic operations that are communicated to the user. These are: Added, Removed, Modified, and Unchanged. The diff tool thus gives a series of edits that will take the first workflow and produce the second. The legend connected to the Run Diff button describes the color scheme used to represent each of the edit operations.
Double-clicking on a module will move the viewport of the other workflow to display the corresponding module (if there is one). Right-clicking on the module gives a ‘Show module level differences’ option. Clicking this item will show the differences between the clicked module and the corresponding module in the other workflow.
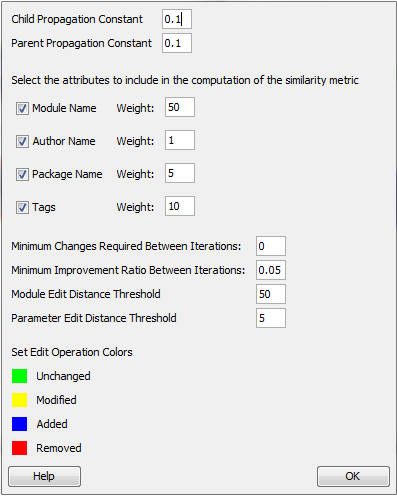
Finally, the Configure button on the bottom right of the window will produce a dialog that has a set of tunable parameters for the diff algorithm. These are already set to generally optimal values, but the user can change them to meet particular needs. The parameters are described below.
Child Propagation Constant: To establish correspondences between workflows, a similarity propagation method is used. This parameter tells the algorithm how strongly the similarity between two modules affects child modules.
Parent Propagation Constant: Similar to child propagation constant, but describes the effect of similarity on parent modules.
Select the attributes to include in the computation of the similarity metric: In this section, there are checkboxes for four module characteristics (Module Name, Author Name, Package Name, Tags) and each of these attributes, if checked, has an associated weight. These are the four module components that are used, along with their respective relative weights, when computing the similarity between any two modules. At the moment, all other module attributes are ignored.
Minimum Changes Required Between Iterations: In order to compute the differences between workflows, the algorithm first needs to establish correspondences between nodes in the two graphs. This is done in an iterative way, gradually approaching a minimum edit distance. This parameter allows the user to specify a minimum number of changes required between any two iterations. Increasing this value will result in faster convergence, but a potentially poorer mapping.
Minimum Improvement Ratio Between Iterations: Much like the previous parameter, this one controls the speed at which the mapping algorithm converges. More specifically, after each iteration, a mapping score is computed and compared to that of the previous iteration. If the improvement is insignificant, it makes sense to stop iterating. Again, increasing the value improves performance, but may degrade the quality of the module correspondences across the two workflows.
Module Edit Distance Threshold: This parameter tells the diff algorithm how different two modules should be before they are considered unrelated. In other words, when two corresponding modules are compared, there is a threshold edit distance above which we mark the module in the first workflow as ‘Removed’ and the corresponding module in the second workflow as ‘Added.’ Below the threshold, the two modules are labeled as ‘Modified.’ Raising this value means the user has some prior knowledge that a lot of the modules in one workflow have been significantly altered in the other workflow, as opposed to being replaced by analogous modules.
Parameter Edit Distance Threshold: Similar to the above threshold, this one works on the parameter level. The purpose of this is to accurately describe the parameter-level differences between modules. This is relevant when a user double-clicks on a given module after running the diff tool. Again, a higher value implies that corresponding and different parameters are being significantly altered between the two workflows, as opposed to being removed in one workflow and created from scratch in the other.
Set Edit Operation Colors: This is simply a convenience for visualization. The user can specify the colors used in labeling modules in the diff interface.
| Previous: 6. Creating Modules | Table of Contents |


